Booster and bearing question
-
garyh
Booster and bearing question
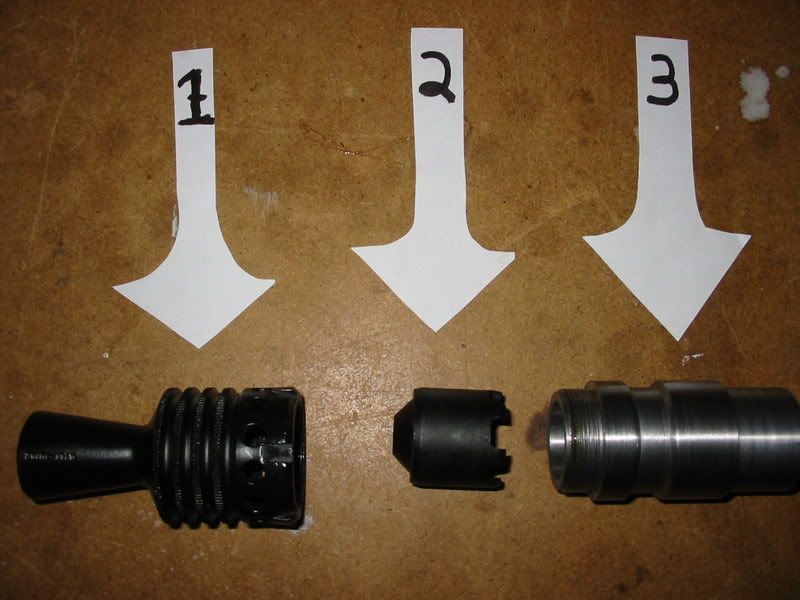
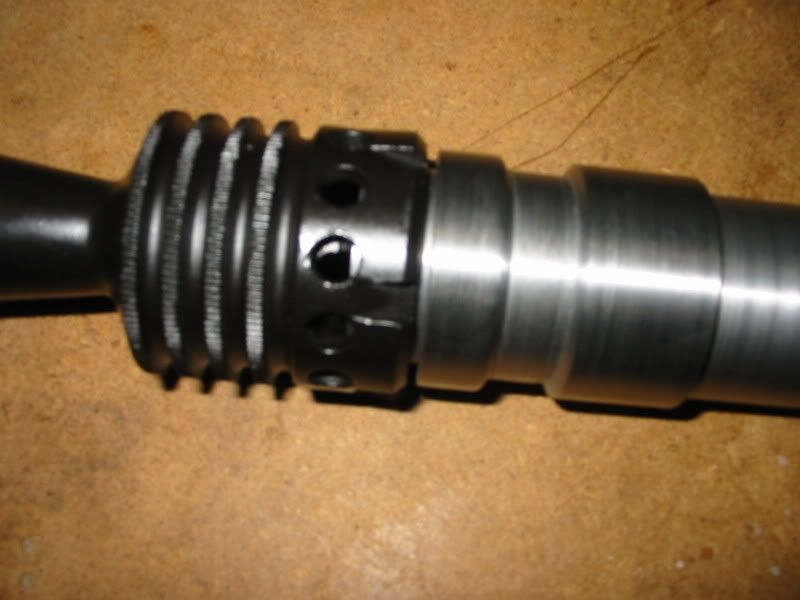
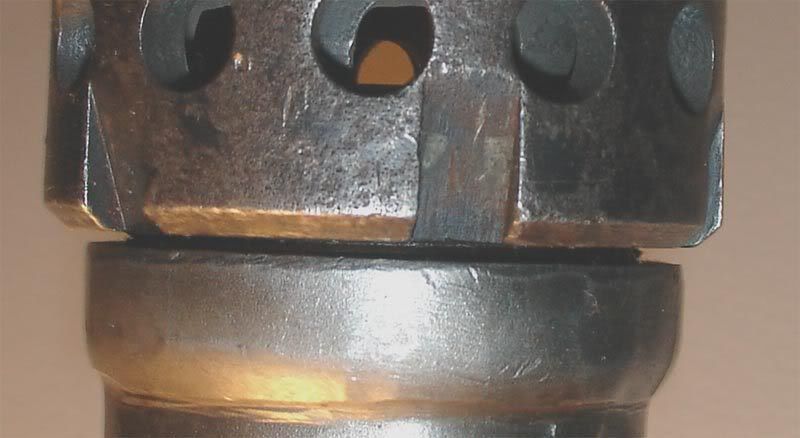
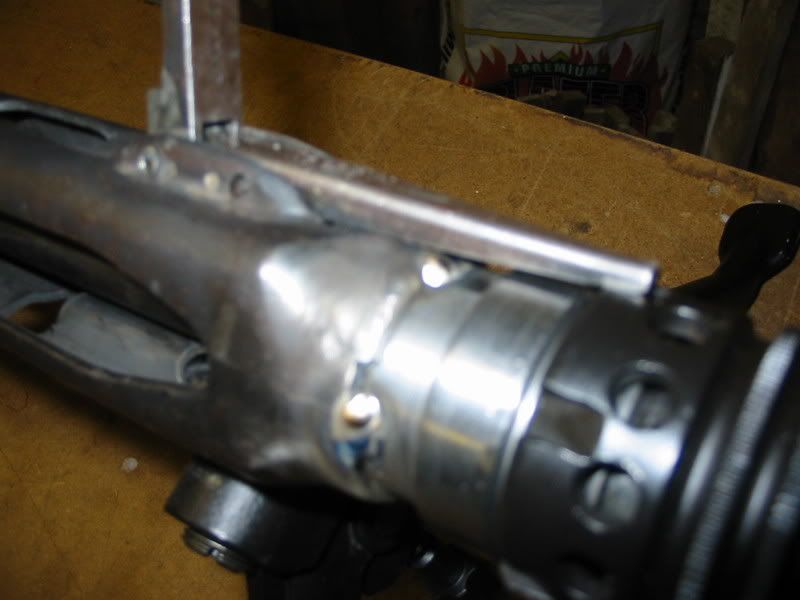
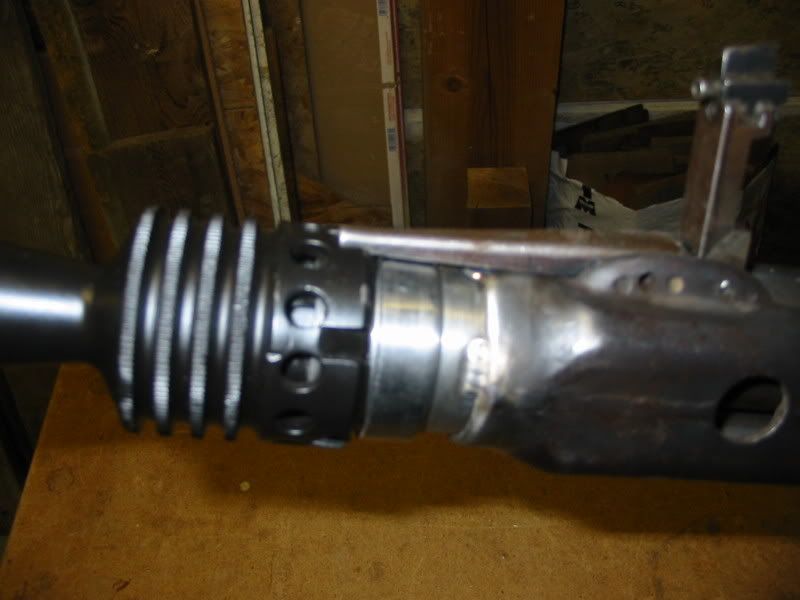
I made a new bearing on the lathe today, and attempted to screw the flash hider on, and found that it won't completely thread on, and seat against the shoulder! I will post some pics showing what is going on... Part #2 is preventing the hider form seating. Should part # 2 float in the flash hider? Or be solid?
-
none123
ah i see 
...edit... just grabbed one of mine and it does as you describe.. it seats aganst the bushing
just grabbed five more and they all do... I never paid attention to that before. It makes sense though as the bushing is used to constrict the exit hole and has no need to move
Nice start on the support bearing.
-
smoggle
-
Demontrooper
- Oberstleutnant

- Posts: 476
- Joined: Fri Sep 08, 2006 10:52 am
- Location: The Greatest Empire the World Has Ever Known
- drooling idiot
- General

- Posts: 1495
- Joined: Sat Mar 12, 2005 10:30 am
- Location: Philla ,PA
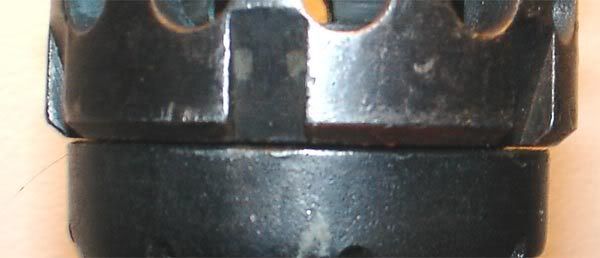
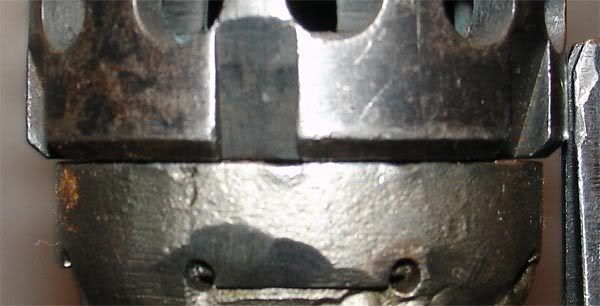
no the flash hider is held from rotating by the finger piece shown on the right side of none123's second picture . it locks into the recesses cut around the booster.
- Attachments
-
- diagram of MG42 muzzle attachments
- Muzzle cone.jpg (21.23 KiB) Viewed 2078 times
Last edited by drooling idiot on Wed Nov 08, 2006 4:55 pm, edited 1 time in total.
"good , bad, .....I'm the man with the gun."
Its amazing anything works right around here with a bunch of
over-age juvenile delinquents running the place.
Its amazing anything works right around here with a bunch of
over-age juvenile delinquents running the place.
- DARIVS ARCHITECTVS
- Field Marshal

- Posts: 2451
- Joined: Wed Aug 31, 2005 12:24 am
- Anti-spam: Mg42
- Location: Minnesota
The flash hider should be screwed on all the way, then backed off until that finger piece engages one of the slots and locks the flash hider in place, preventing it from getting looser or tighter. The finger piece is spring loaded to keep it engaged. After shooting, remember to disassembly the flash hider, remove the recoil booster, and take out the barrel bushing (after removing the barrel of course). These parts were originally soaked in kerosine and brushed or scraped as required to clean off the carbon deposits. Clean these parts thoroughly after every trip to the range.
DARIVS ARCHITECTVS
Knight's Armoury
Knight's Armoury
-
garyh
Thank you guy's very much for the help, the good pics and the compliment....Now for another question! When I go to weld in the bearing, how should I go about positioning correctly? Should i set it in so the recouperator puts tension on everything? Or should I set it to just aloow the barrel to removed?? I don't know what to do since my kit had no rear reciever pieces, and no barrel bearing!!!! Any thoughts, or help??
Gary
Gary
- drooling idiot
- General

- Posts: 1495
- Joined: Sat Mar 12, 2005 10:30 am
- Location: Philla ,PA
lets use this picture as a reference .
now it shows OAL , but you have a custom bearing so you'd need a length from the shoulder before the threads to the same dimple against where the cam section rests .
that measurement is 21 5/8" , go slightly heavy as its actually metric.
also be aware that you will need to time the keyways correctly before welding to allow the barrel bearing to fit in at the correct orientation.
have you heat treated the new bearing or is it machined from hard enough steel to take the abuse?
- Attachments
-
- MG42 front end measurements.jpg (32 KiB) Viewed 2065 times
"good , bad, .....I'm the man with the gun."
Its amazing anything works right around here with a bunch of
over-age juvenile delinquents running the place.
Its amazing anything works right around here with a bunch of
over-age juvenile delinquents running the place.
-
garyh
-
Demontrooper
- Oberstleutnant

- Posts: 476
- Joined: Fri Sep 08, 2006 10:52 am
- Location: The Greatest Empire the World Has Ever Known
-
garyh
From the parts that I do have, I figured out that the relifs have to face to the right. i also noticed the "Master Spline so it can only be assembled one way! Pretty neat stuff! Guess that cuts down on confusion in the battlefield! HAH!  So does anybody know where I should postion the bearing for proper operation? I plan on tack welding it in with the bolt locked up to the barrel extension, barrel forward, as if it was in battery, with everything snug. Then I will pull the bolt back with the charging handle, and see if I can remove the barrel?? Sound good?? Yes, no?
Gary
Gary
- drooling idiot
- General

- Posts: 1495
- Joined: Sat Mar 12, 2005 10:30 am
- Location: Philla ,PA
sounds good lets run down the check list for anyone else .garyh wrote: So does anybody know where I should position the bearing for proper operation? I plan on tack welding it in with the barrel forward, as if it was in battery, with everything snug. Sound good?? Yes, no?
Gary
drop the barrel bearing into the NEW bearing sleeve ,
insert the barrel into the shroud
put a thin (1/16th" or less) washer as a spacer into the bearing between barrel's muzzle and inside of the bearing.
Now push the barrel forward in the shroud until the collar of the locking piece hits against the barrel stop which is riveted inside the shroud by the barrel door.
push the bearing and bushing (with washer) back onto the barrel as far as it will go without moving the barrel away from the internal stop.
that is your length.
check and double check your orientated so that the barrel bearings cut out is on the barrel door side and tack weld it in place for testing.
you don't need to involve the bolt or any other parts at this stage .
: edited to make more detailed instructions :
Last edited by drooling idiot on Wed Nov 08, 2006 4:56 pm, edited 2 times in total.
"good , bad, .....I'm the man with the gun."
Its amazing anything works right around here with a bunch of
over-age juvenile delinquents running the place.
Its amazing anything works right around here with a bunch of
over-age juvenile delinquents running the place.
-
garyh
