Page 1 of 2
This is MY MG42 build
Posted: Thu Sep 28, 2006 1:04 am
by stearmandriver
I hope nobody minds if I describe my build process. I've been listening (reading actually) for a few months and have decided to take the plunge. My intention is to use my best jugement on which methodes to use. I welcome comments, suggestions, and critics, but sometimes the only way to learn is to make the mistake. Nuff said, here's my build.
I bought a SOG yugo parts kit for $250

Then I bought a reciever set from IMA for $135. After I cleaned up the parts and played with them for a while, I drilled out the rivets, IMHO the proper way to remove them.

I have test fit the pieces and am happy with the fit. I am going to go to an electrical supply house to get some copper buss bar. I will use this as my alignment bar by transfering the holes from the rails. I beleive this to be the proper way to align the sections. As suggested, I'll make the gripstick hole mod and the bolt bloker before welding up the sections. I bought a camming section ($125) and will have to fit that after a bit.
More to come......
Posted: Thu Sep 28, 2006 9:15 am
by propos
Don't worry about making mistakes. That's one way we learn how to do something. A guy I knew always used to say, "If you haven't made any mistakes, then you haven't been working." Don't try to rush the job. Think things through before you start. Visualize what you want to do first, then do it. Enjoy building your SA-42. Because once your finished, that's it. With the way things are with future importation of kits, you probably will never have the opportunity to build another one. I can almost foresee the day when an MG-42 complete kit will sell for some major moola. These kits and parts are starting to be worth their weight in gold.
Keep us posted on your build.
Posted: Thu Sep 28, 2006 9:31 am
by Cpt_Kirks
Why would anybody do anything other than drill out the rivets?
I may grind down some AK rivets, but that is because I plan on leaving some rivet in the hole for tapping.
With MG42 receivers, you have access all the way through the rivets. Center punch, drill little hole, drill bigger hole, rivet head spins off, use punch and hammer to tap out remaing. Move on to next rivet.
I think it took about 15 minutes to get all six of the rivets out of my IMA sections.
Posted: Mon Oct 02, 2006 10:22 am
by Demontrooper
Stearmandriver, lets see what you are going to do with that camming section! I am doing exactly the same thing as you, but I think that I will fabricate my camming section (but I am still tempted to use my peice from Sherman just like you).
Posted: Sat Oct 07, 2006 12:46 am
by stearmandriver
So..... I got my camming section. I was so excited to play with it I forgot to take a 'before' picture. But after some careful measuring I cut out what I needed.
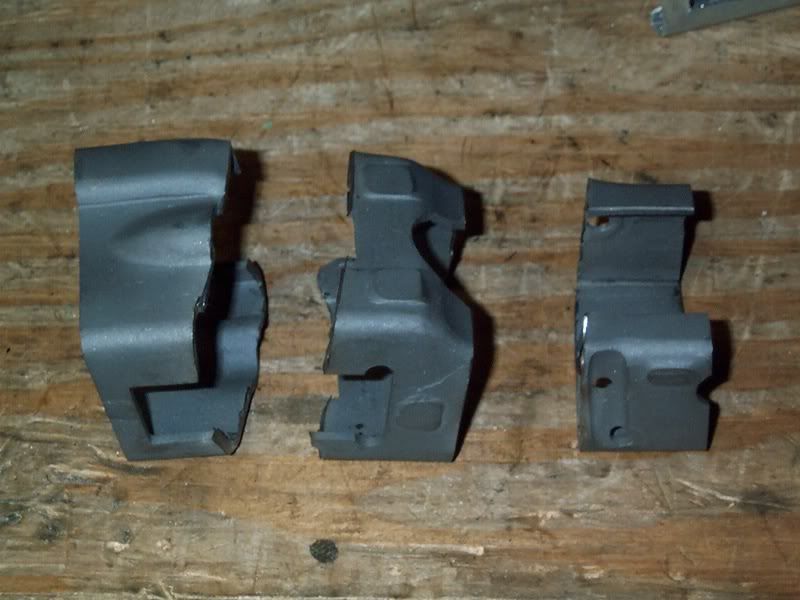
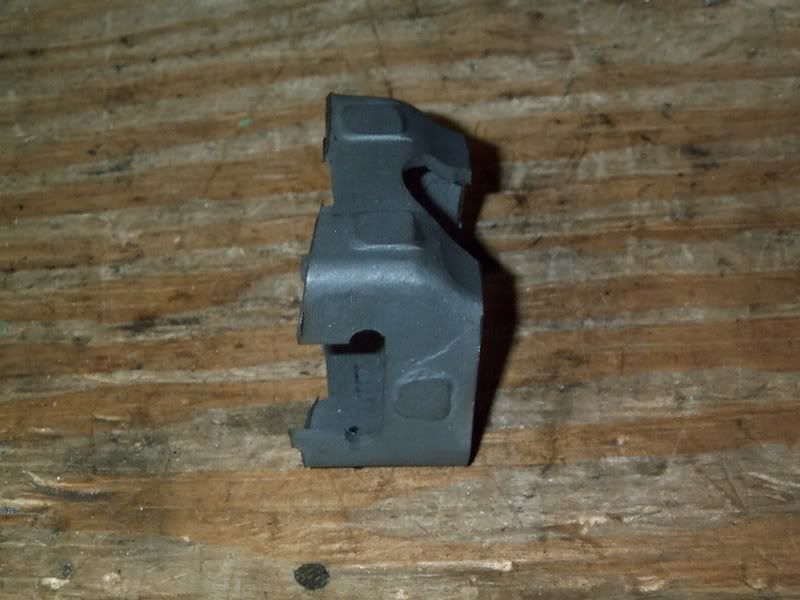
Which left this:
And fits like this:
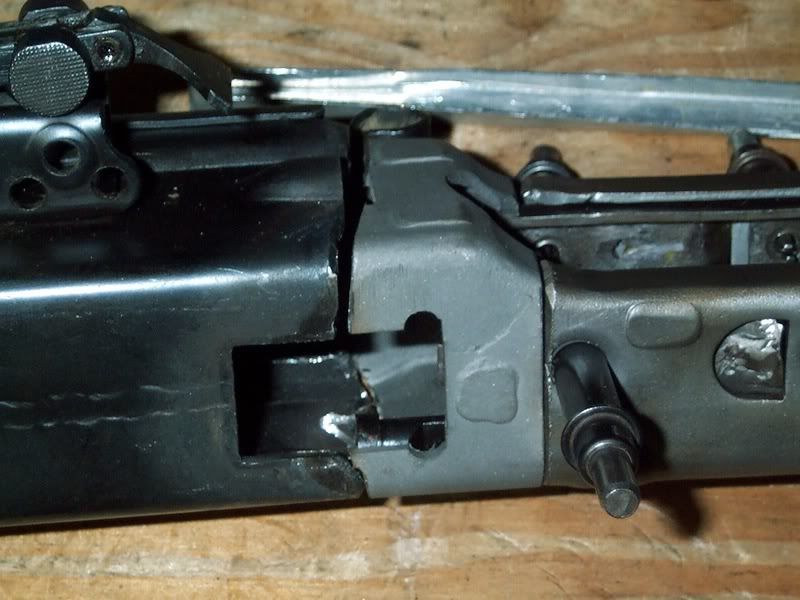
Armed with these parts, I'm hopeing to maybe do some welding next weekend. I'll spend this week getting things aligned just right.
More to come........
Posted: Sat Oct 07, 2006 7:30 pm
by drooling idiot
can i suggest you connect the center section to the should first so that you can get inside to clean the weld were the barrel and recuperator rub real easy.
what are the "buttons" in the rivet hole locations?
Posted: Sat Oct 07, 2006 9:55 pm
by stearmandriver
Drool, the 'buttons' you are refering to are called cleaco fasteners. We use them in the aircraft industry to temporarlly fasten parts together. They are spring loaded and use a special pair of pliers to use them. They are excellent to use, come in four popular sizes, and are not that expensive (untill you start buying 100 of each kind) check out
http://www.averytools.com the pliers are pretty cheap too.
Posted: Sun Oct 08, 2006 2:42 am
by MGMike
Stearman:
I'll check out that tool house. Thanks
Posted: Sun Oct 08, 2006 10:49 pm
by stearmandriver
Finally a day off. This will be Demontroopers favorite post since I'll be writing about the camming section. here it go.....
So I took Drooling Idiots advice (and excellent advice it was) and attached the camming section to the barrel first. Sorry I have no pics of the set up, but I get into a groove and there ain't no stoppin' me. As you saw before, I trimmed the camming section and squared and beveled the outer edges a bit. I also bead blasted the area to be welded. I had gone to home depot and purchased some 1&1/4" plate that was the thickest they had I believe it was 3/16". I used that to help hold and align the pieces from the inside. A C-clamp worked well to hold this in place. I then took a straight edge block and clamped that in place using a set of C-clamp vise grips. This helped to align another side of it. I measured the left roller cam hole (I think it was 1 & 10/32") and eyeballed the general alignment.
Got my MIG welder (a Lincoln Mig using gasless wire) out and tacked the one corner (the left lower ). Then I clamped another staight edge bar to the top and again eyeballed the alignment. Tacked that.
Unclamped the rig and turned it 90 degrees, clamped the straight edge bar onto the right side and visually checked the alignment (I was amazed at how acurate one could be just using ones eyes). I tacked the right upper corner. I did the same routine for the right lower corner and VIOLA!!!! It was tacked together rather straight.
I unclamped everything and looked it over. I was very pleased. Next I took a small (like a 1/2" square) piece of copper plate and clamped it under the gaps. Weld weld weld. Move to the next gap, same methode. Weld weld weld. I repeated this untill it was done.
Now to clean it up. I used a Flapper disc on my 4" angle grinder to grind bown the welds. Used a few other attachments on my hand held angle grinder to finish it further. Cleaned up the insides a bit (this is where drooling idiots advice came in handy) bead blasted it and PRESTO!!
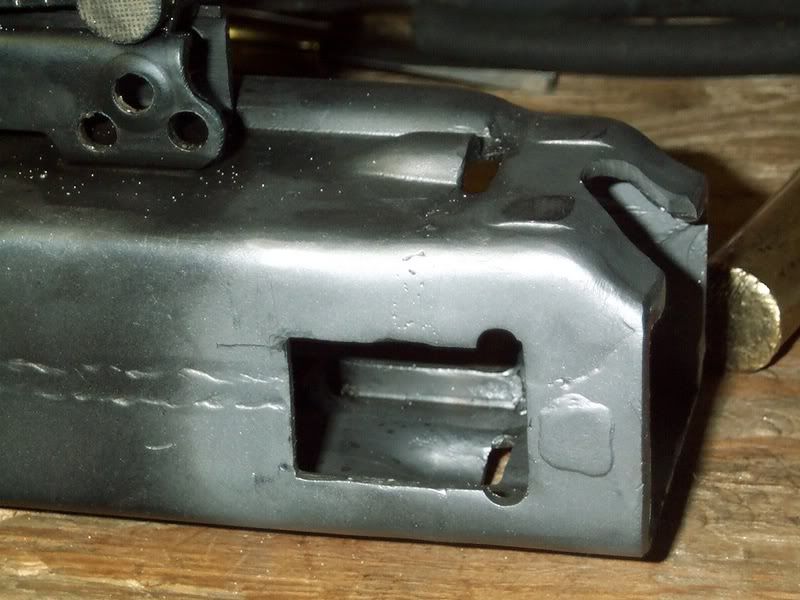

Uh oh, the WIFE is calling...... gotta go

More to come.......
Posted: Sun Oct 08, 2006 11:17 pm
by Karbinator
I never thought about using those fasteners for that. I use them for work
applications when prepping. Here's where I get mine
http://www.irvansmith.com/catalog2/parts/clecos.shtml
Posted: Mon Oct 09, 2006 9:22 am
by Demontrooper
You spoiled brat!

That looks great! I wish I could be doing my build along side of you (over the net), but I do not have the time to even start yet! Keep it up man!
Posted: Tue Oct 10, 2006 12:30 pm
by zallen
Looooking Good! Good luck with the rest.
Posted: Fri Oct 13, 2006 10:38 am
by k75zracer
How are you going to repair the nose cone section? Are you going to get a replacement section and weld that in or are you going to do an area repair. Let us know what your plans are as I am up against the same kinds of issues.
Posted: Fri Oct 13, 2006 1:53 pm
by stearmandriver
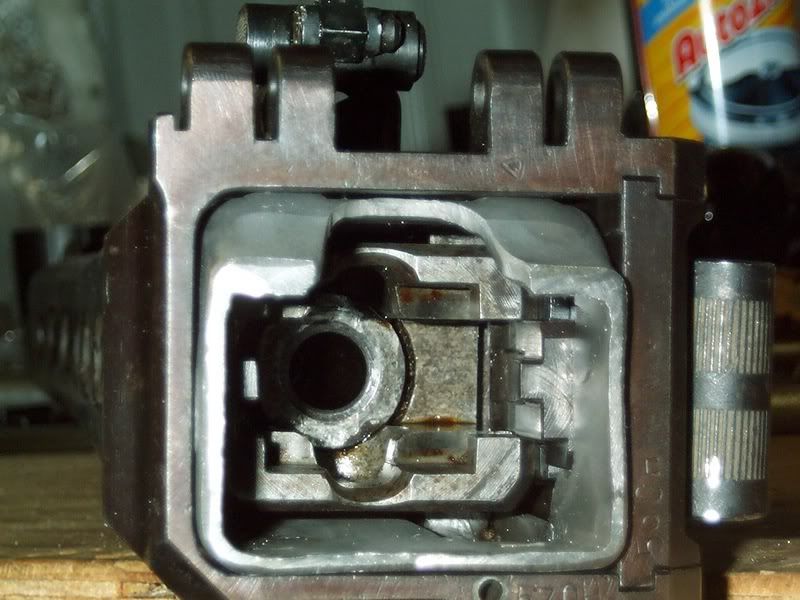
I was planing on machining a nose piece. Mine was cut off nicely and there is some of the old piece still in there with the broached slots still there. Enuf to at least align and I won't have to machine the chamfer or the right side relief (for the barrel extraction) Anyway, that's my initial plan.
Posted: Fri Oct 13, 2006 5:13 pm
by mr. wipple
looks good and best of luck with the rest of your build.
Posted: Fri Oct 13, 2006 5:59 pm
by 041x
Looks great. Make sure to post some more pics
Posted: Fri Oct 13, 2006 6:52 pm
by k75zracer
I was thinking of the same thing as you. I think that the remaining section of nose piece can be used as an alignment/example section and I would be able to put in the new sleeve, weld in some small slivers to repair the rest of the area, or at least, thats my plan.

Posted: Tue Oct 17, 2006 6:33 am
by avman
Where did you buy the cam sections??????
Posted: Tue Oct 17, 2006 9:17 am
by stearmandriver
I got mine from one of the members, but he is out of them. Keep looking as I'm sure some will turn up soon. Those sections are out there, I think people are sitting on them. ( not literally, that would be really uncomfortable.)
Posted: Wed Oct 18, 2006 9:42 pm
by avman
If anyone knows where I can get a cam section, please let me know.
Why can this not be made from thick sheet metal and welds? Heat threat it and you will at least have a functional gun. You really do not see this area once it is put together. I had to build custom parts for a care I restored.