Page 1 of 1

My MG42 Lafette Restoration Project

Posted: Tue Feb 24, 2015 3:35 pm
by Shelly
Now that I have been going a bit, it is easier to back up and start from square one...

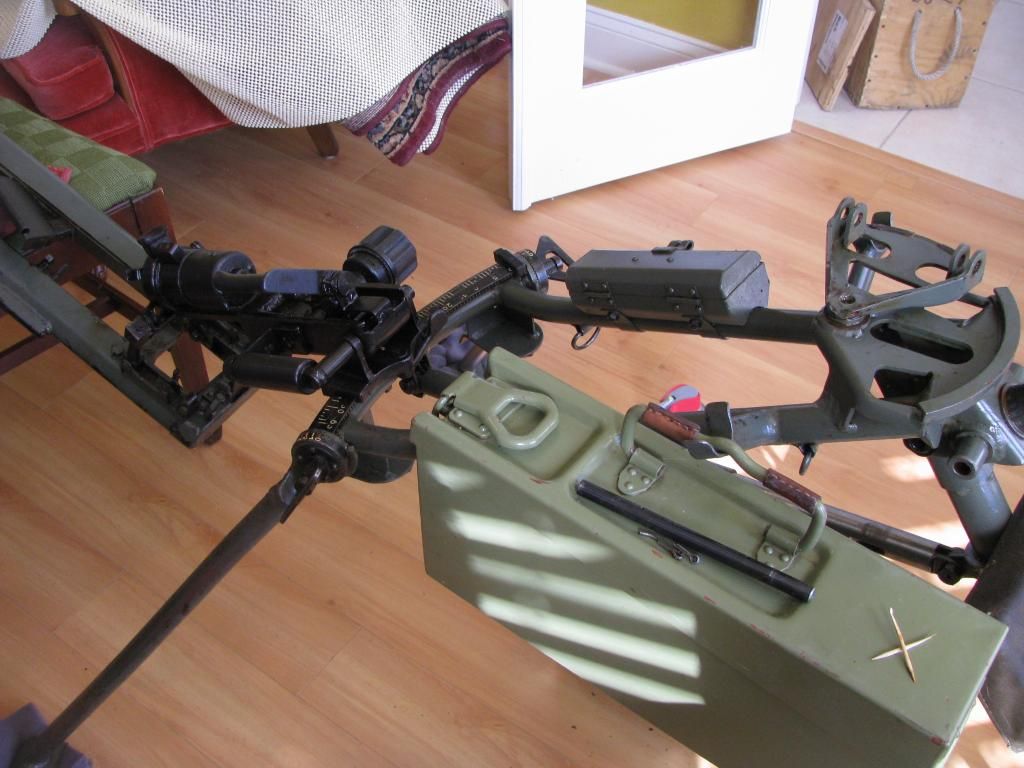
I have a nice ex-Serbian Lafette that, while in good shape, had very worn paint and was packed with grease and leaf mulch! The thing was really icky.

Image

The first thing I had to do was drag the Lafette outside and clean off the outside as best I could as it was very dirty and things like screw heads, slots, etc. were just caked with grease and dirt.

The two printed references I have are a Serbian manual and an English copy of a WW2 German manual. Neither are terribly helpful as to how to actually take the Lafette apart, although the Serbian booklet has some clues. I started with the simple stuff.

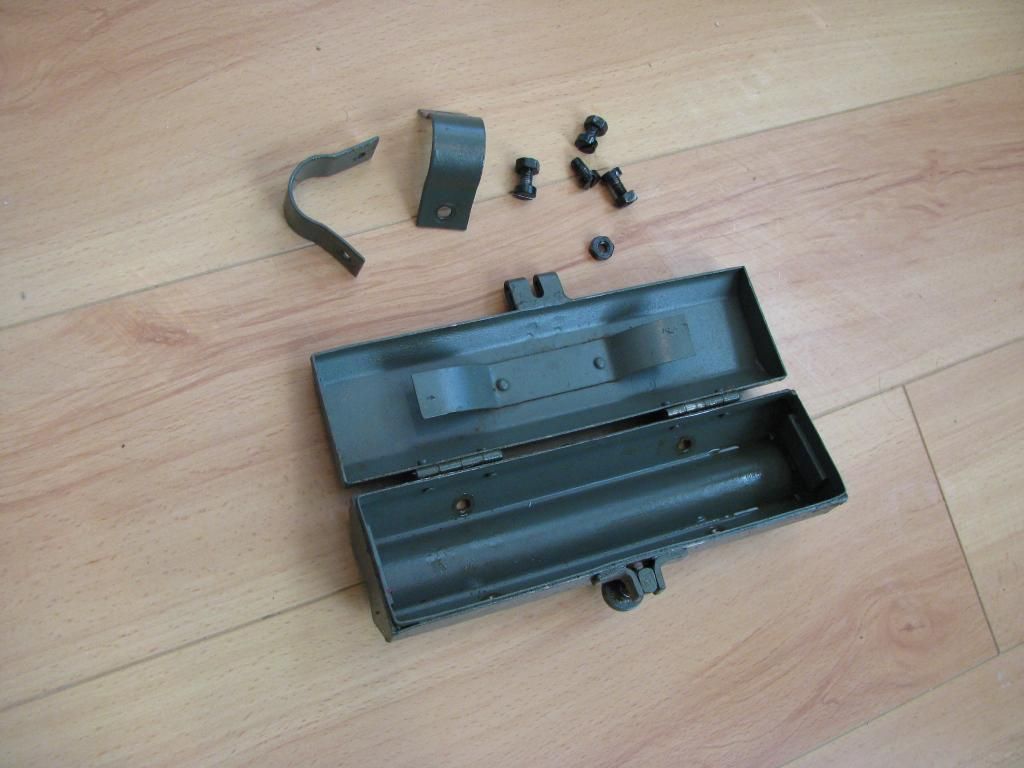
The bolt box was easy to remove. It is held on by four nuts/bolts through two metal straps. The latch of the box is not easily removable nor is it easy to take the box apart.

Image

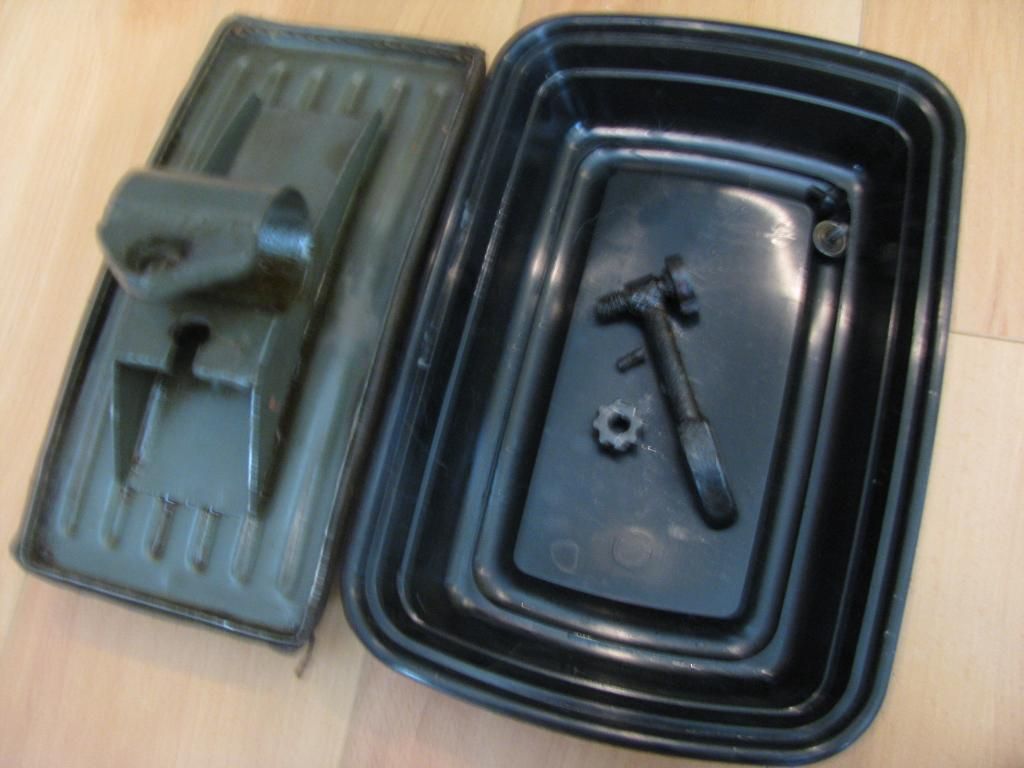
The removable pad on the front leg was no big deal. Note the reverse threaded star shaped nut is held in place with a small capture screw.

Image

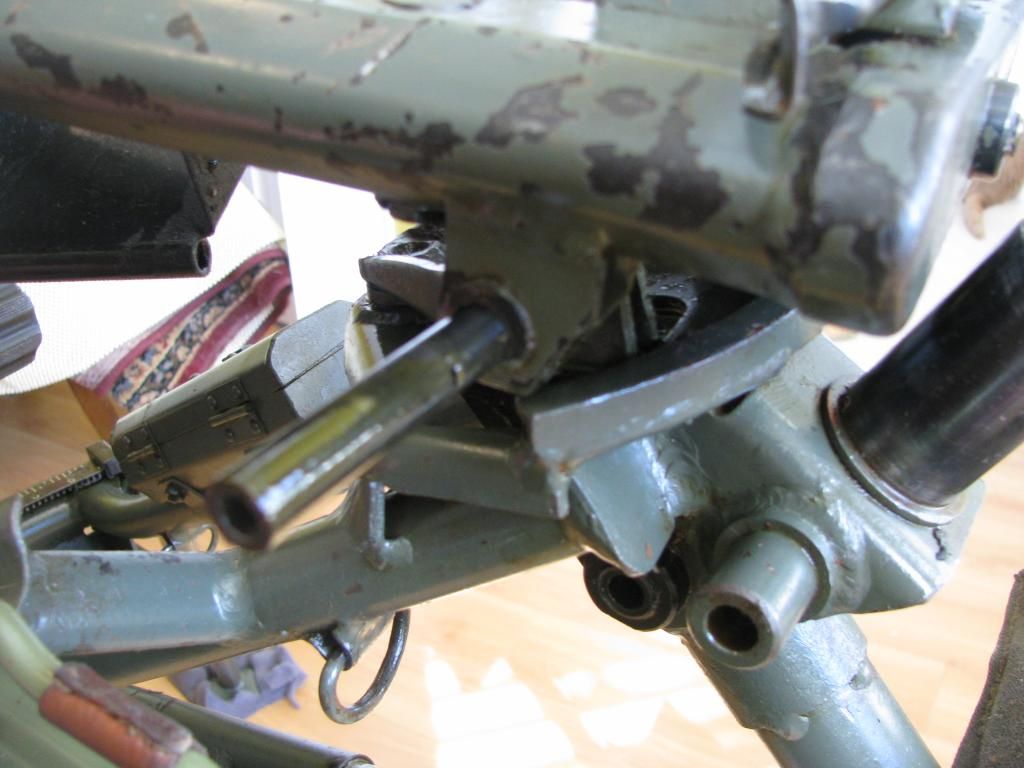
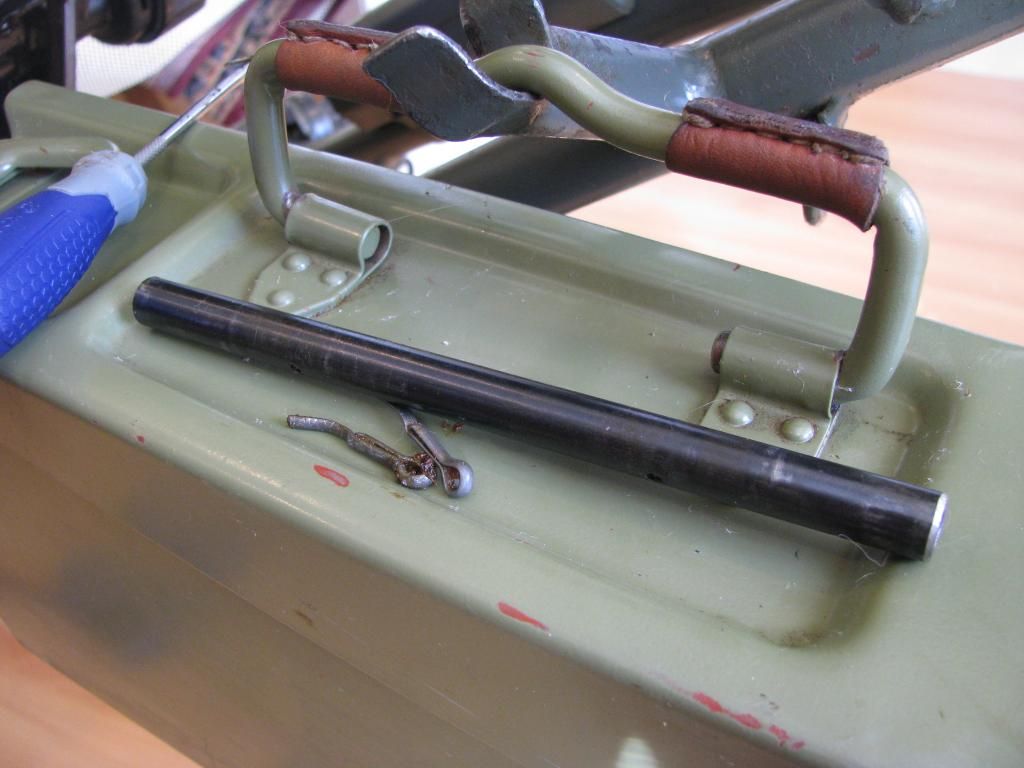
I could tell by the Serbian manual that the front axle that holds the top of the Lafette to the bottom was held in with two cotter pins. These pins had been bent back and, in the end, broke during removal. I can replace them easily with new pins from the hardware store. I had to drift the axle out with a small hammer.

Image

A hooked pick was useful to pull the pins out towards the front of the Lafette.

Image

With the front axle removed, the top of the Lafette can be swung backwards. I used rags to protect my chair from the grease since the chair was needed to support the top.

Image

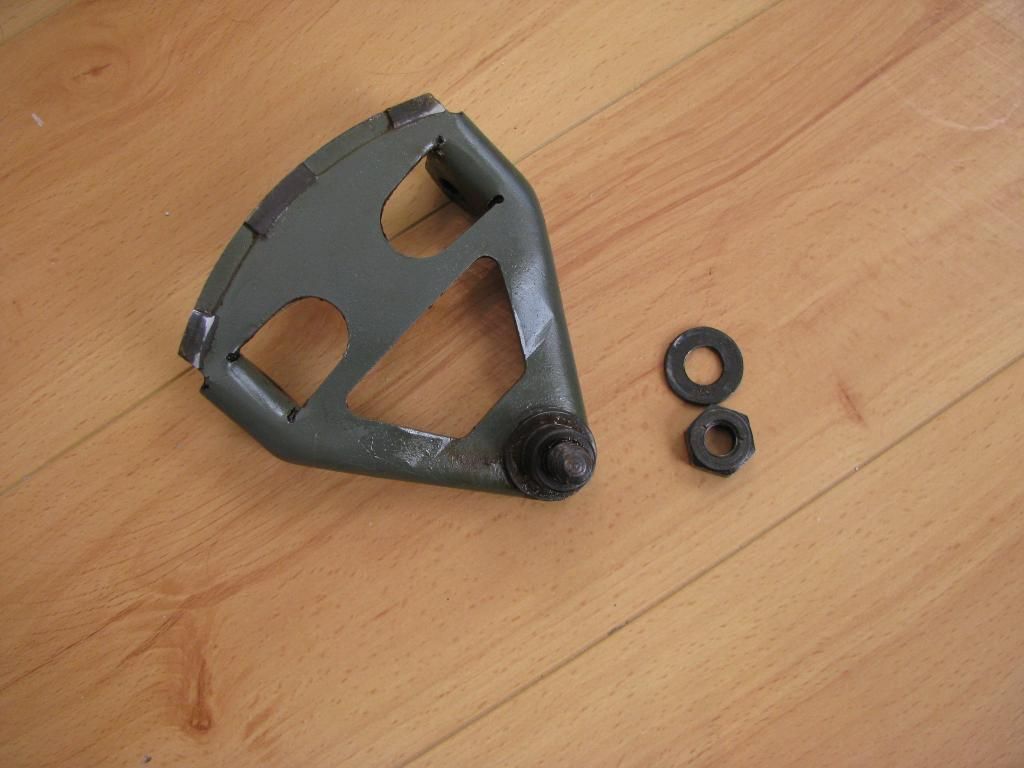
The front hinge can be removed from the base of the Lafette once the axle has been drifted out. It is held in place with a large nut and washer. The bottom part of the piece is polished metal and will not be repainted.

Image

Re: My MG42 Lafette Restoration Project

Posted: Tue Feb 24, 2015 4:08 pm
by Shelly
Taking the top of the Lafette off from the fire control mechanism is a PAIN. It took me a long time to figure this out. There may very well be a better way, but this is how I had to do it...

These large screws actually don't do much... but I removed them. It seemed like it would be easy to undo the screws and take the little support legs off, but noooo... The screws just are, well, screws. But when you remove them, nothing comes off.

Image

This is a blurry picture, and I apologize... The top/front of the little arms are held in place by a large, flat headed, pin. To get the top of the Lafette free, I had to remove ONE of these pins. They resemble a shoulder bolt but the end is not threaded. Instead, it is hollow. The pins fit through a thick washer and the hollow end is peened out so the pins are locked in place. I had to use a smal punch that would fit inside the hollow pin end, and hammer out the pin from the washer.

Image

When you hammer out one pin, you can actually slide and slip the two legs off of the fire control unit. One leg will now be loose (the one you unpinned) and the other will be attached to the top of the Lafette.

I need to figure out how I will reassemble that pin. I am not keen on having to try to hammer it back into place. I may cheat and use a modern shoulder bolt and nut, painted to match the Lafette. I would keep the original pin and washer. This would make it a lot easier to take the Lafette down again in the future. The use of a flat headed shoulder bolt and nut on the inide would be largely invisible too.

To remove the fire control assembly, simply unscrew the metal firing arc strip (four bolts and nuts). Lift this off the lower Lafette frame, remove the two limiter clips, and slide off the mechanism from the arc. The little spring loaded clips are in two parts, with a spring in the middle.

Image

The optics mount is easy to remove from the top left rear of the upper Lafette. There are some folded over lock washers that need to be carefully flattened out to free the nuts. You will notice these on a few parts of the Lafette. Instead of using a crown type lock washer, the Germans used a thin, flat, Washer, and then folded one edge up and alongside the nut to hold it in place.

Image

There are a lot of parts on the optics mount. A couple do not seem to come apart. I also couldn't get the large wing nut off. Everything was very very dirty

Image

A problem I ran into with my gun and Lafette combination is that the Wise Lite Arms MG42/M53 is about half an inch longer than a "real" MG42. SO, the front locking lug under the barrel does NOT fit into the clamp on the Lafette :(

Image

I really don't know how to solve this. Well, may be I do... The gun locks in place securely at the back. The gun's lug does fit down into the mount at the front... just the clamp does not lock it in place. So, I think a leather strap around the top of the Lafette and over the barrel jacket may do the trick. I can't see using the gun on the Lafette too much. It's mostly for show. And, when I do use it, it would be on a hard, smooth, even surface. I've shot the gun already and don't see where the recoil would dislocate the gun if secured at the front with a strap. The only other solutions I could think of were having someone unweld and reweld the lug under the gun, or having a new clamp machined for the Lafette (too expensive).

Re: My MG42 Lafette Restoration Project

Posted: Tue Feb 24, 2015 5:24 pm
by messerschmittfan
I used a dremel with cutting wheel on my Wiselite block to make it fit. Not quite a 1/2 half inch had to come off but it fits. I will be replacing the block in the future. Harry

Re: My MG42 Lafette Restoration Project

Posted: Tue Feb 24, 2015 5:47 pm
by Shelly
The block on my gun is too far forward not backwards.

Re: My MG42 Lafette Restoration Project

Posted: Tue Feb 24, 2015 9:15 pm
by 42rocker
Great thread -- Nice pics. Thanks for sharing them with us. Please keep it up.

Now I believe that the locking piece is held on by two rivets. Drill out and save original piece and make another one that will fit in and do the job. Rivet in place. Even if it lifts the barrel shroud a little bit. Think it over.

Later 42rocker

Re: My MG42 Lafette Restoration Project

Posted: Wed Feb 25, 2015 9:37 am
by Shelly
I haven't gotten to looking at the forward lock assembly yet... I thought it would be easy enough to get a new locking clip made that just had a longer lip to extend forward to engage the lug on the gun... but finding a machine shop is not so easy. Everyone says just go get something machined... but around here there are no little old school machine shops. I checked one place and they have a $500 start up fee plus materials, labor, etc. It would cost me $1000 to get a simple square with a hole in it and a flange on one end. Not worth it given I probably won't lug the Lafette out to the range very often versus using it as a display stand.

I wanted to document what I did to take the Lafette apart (I took dozens of pictures) so I can put it back together and also to, hopefully, make this easier for someone else in the future. I was surprised how hard it was to find ANY information. Even talking to a couple of people who have worked on these, getting help was like pulling teeth.

Re: My MG42 Lafette Restoration Project

Posted: Wed Feb 25, 2015 9:57 am
by Shelly
The spent casing chute sort of got in the way so I removed it from the center of the recoil slide. I could have taken it off after I disassembled the top of the Lafette but it was not hard to remove at this stage. The forward nut and bolt would have been easier to undo at a later stage, though. You can see more of those peculiar lock washers. They are keyed to lock into the Lafette rail, then when one edge is bent up, it serves to lock the nut in place.

I put the parts from each assembly like this into an individual little zip-lock plastic baggie. This way I don't get parts mixed up.

Image

At this point I got sick with Pneumonia and that slowed me down a lot. I didn't do much work for a while. I did clean and prime some of the parts in preparation for painting. Plus, this protects them from the possibility of rust. I use a brass brush that mounts in a power drill to clean up the parts a bit before priming. The brush removes any traces of old paint, oxidation, etc. On the other hand, I did not go overboard on this. I'm sure the real thing was painted quite a few times over the decades without much care. The paint spray inside the bolt box came out rough so I need to sand it a little. I used a red automotive sandable primer.

The bottom of the front pivot was masked with tape. I like the blued finish on the bolt box locking nut so that will not be painted.

Image

Taking the recoil sled apart is when things got complicated and also NASTY. First, you need to remove the smooth, round, nut that holds the piston to the front end of the sled frame. I had to buy a strap wrench to hold the piston, and used a vice grips to turn the frozen nut. The nut seems to have required some sort of security wrench or some other archaic tool to remove originally. I don't want to destroy the finish on the Lafette when I put it back together, so I may substitute a modern metric nut of the appropriate size. I figure I can keep any original nuts or pins I do not use. But, for the sake of simplicity, neatness and in case I have to take this thing apart in the future, I don't want to have to go through the hassle of these odd nuts.

With the piston disconnected, you can take the back of the recoil slide off. The rear end cap is held on by a couple of big bolts. Nothing complicated or that required any great photographic documentation. There are TWO SMALL SPRINGS INSIDE THE END CAP that you have to disconnect. I used a small hook and a long, curved, hemostat that I bought from a cheap tool stand at a flea market.

You can see the springs in this photo, although they are largely obscured by cosmoline and leaf mulch and dirt. The springs attach to hooks inside the frame arms.

Image

This thing was mega dirty inside. Horrible and just gross.

This is the remote trigger arm and a lot of crap... There are some black metal sleeves that some of the screws and bolts go through. Sometimes these come out and sometimes they don't...

Image

I used WD40 to cut through some of the crud and used paper towels and rags to scoop out large quantities of thick grease and glop. Then, the parts were rinsed in boiling water. This melted more of the grease. Following that, the parts were soaked in a bucked full of Purple Power and Simple Green. A final pressure washing removed more of the cosmoline. The parts were about 95% clean.

Re: My MG42 Lafette Restoration Project

Posted: Wed Feb 25, 2015 10:08 am
by Shelly
To remove the center part of the recoil slide, simply grasp the two sides of the outer frame and pull them apart slightly. This frees up the center rails and you can slide the whole gun mount and recoil piston out of the back of the frame. The Serbian tech manual illustrates this handy tip.

You can see the rollers inside the frame, and the clips at the rear end. The springs in the end cap attach to these clips.

You can see the one remaining mounting arm still fixed to the frame, and the empty brackets where I removed one arm to take the Lafette apart. I did try to remove the second arm, but the lock washer is really peened on good and I gave up on it. When I put the other arm back on during final assembly I will most likely use a modern shoulder bolt and nut for simplicity. If, for any reason, someone else in the future wants to add the original peg back on, they can do it themselves. Oddly too, those little arms are in quite a few pieces although I am not sure how exactly they come apart.

Image

In the above photo you can see the lock washers and nuts that hold the rollers in place. I did not see a reason to remove these. The rollers are clean and rotate freely. And, I am not going to paint the inside of the slide (it was not painted here).

The top frame after I removed a few doo dads.

Image

The paint was removed by spraying the parts with some aerosol stripper, letting it sit an hour or two, and then scrubbing the surfaces with a brush. I realized the paint came off super easy, so I skipped the brush part and went to a pressure washer hose. That removed about 98% of the paint. A brass brush on a power drill removed any remaining paint and surface junk. I will use a little Harbor Freight wire hand brush in a few nooks and crannies.

At the bottom left is one of those black metal tubes I mentioned that various bolts go through. There were two of these here... one removes very easily.. this one is not going anywhere. I will just wrap some tape over it for painting.